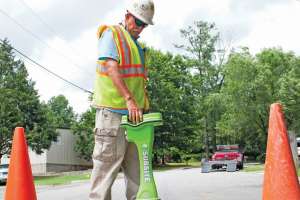

A utility locating technician is a magician of sorts, slowly waving a wand through the air to determine the precise location and depth of a buried utility line — all while enhancing job site safety and productivity. Pretty neat trick, right?
Of course, these are technicians, not magicians, and they’re wielding some impressive technology. But to the uninitiated, understanding and using these high-tech instruments can seem daunting. Transmitters, receivers, grounding stakes, milliamps, as well as hertz (Hz) and kilohertz (kHz) frequencies — how does it all work?
As confusing as it may appear, it all boils down to one simple thing: magnetic fields. If you think back to middle school science, you’ll no doubt remember that electricity produces magnetic fields; and that forms the basis for utility locating.
“It all works off magnetics,” says Matt Lumbers, product manager for Subsite Electronics, a division of The Charles Machine Works Inc. “Anytime electric current flows, it produces a magnetic field.”
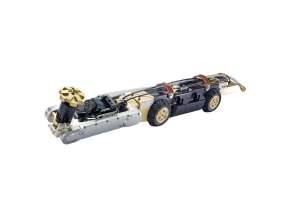
To understand how locators work in concert with these magnetic fields, let’s start from the beginning. The most commonly used locating systems use two basic components: a transmitter and a receiver (a hand-held wand). Both are battery-powered. The transmitter sends current through a line, and the receiver detects the resulting electromagnetic waves, or frequencies, produced by that current. The receiver is capable of picking up a wide range of frequencies, typically ranging from a low end of 256 Hz to a high end of 83 kHz (or 8,300 Hz).
There are two different kinds of locating methods: active and passive. In active detection, you create current by connecting a transmitter directly to a cable or pipe. With passive detection, you’re tapping into pipelines (typically metallic power lines) that create their own magnetic fields or currents. Other types of pipes, such as plastic gas lines, are installed with jacketed lines called tracer wires that conduct electric current.
If tracer wires weren’t installed, other options exist. For instance, you could send a signal-generating device called a sonde through a pipeline via a cable. The wand detects the sonde’s location.
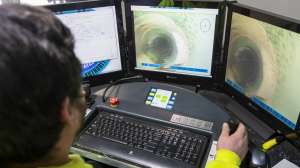
“If this is not possible, then you can use ground-penetrating radar (GPR), which can see nonmetallic objects underground,” Lumbers says. “But this technology is very soil dependent and expensive, which is why it is not used very often.”
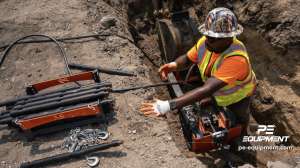
The most common form of utility locating — known as conductive mode — is done with direct-connect cables that resemble jumper cables, with a red lead and a black lead. To begin, plug the direct-connect cable into the transmitter, and then connect the black lead to a ground stake and the red lead to the pipe you’re trying to locate, or perhaps a meter to which it’s attached. In other instances, you might connect the red lead to a pedestal in a utility right-of-way, Lumbers says.
Proper grounding is important: The better the ground, the stronger the signal. As such, it’s best to locate the ground stake as far as possible from the expected trace path. Placing the ground stake at a 90-degree angle from the trace path is your best option.
Next, turn on the transmitter and choose a low frequency for starters, and then set the wand to the same frequency. Look at the wand’s milliamp reading to verify good continuity; the higher the milliamp reading, the better the connection.
Why start at a low frequency? A lower frequency is not as prone to “bleeding off” onto other nearby lines, which is critical in an area congested with underground infrastructure. To locate gas pipes, for example, start around 815 or 870 Hz, Lumbers suggests.
After choosing a frequency, move about 25 feet away from the transmitter and walk in a circle. As you do so, look for a peak response on the wand, which is indicated both numerically and by a change in a tone emitted by the wand. The pitch goes higher when you’re directly above the line you’re seeking, he says.
After you find a peak signal spot, follow the expected trace path. Every 5 feet or so, move the wand from side to side to ensure you’re following the peak signal path. Do this for as long of a distance as needed. If the signal suddenly weakens, the pipeline probably changed direction. Arrows on the wand’s display panel will guide you back, Lumbers says.
If no pipe is located at the initial frequency setting, then work your way up the range of frequencies. “Think of the frequency range as a target where you’re starting at the center ring, which is 256 Hz, and moving outward,” Lumbers explains. “The next stage is midrange frequencies, which typically range from 8 to 33 kHz. And if that doesn’t work, try going up to 44 kHz.”
Soil conditions can also affect utility detection. For example, drier soils make it more difficult to ground a detection system. The workaround? Pour a saline solution around the ground stake or moisten it with water, Lumbers advises. “Wetter soil is always better.”
Poor ground connections or bad ground placement are two of the most common rookie errors in utility locating. “If you’re working in an area with multiple utility lines and place a ground stake over a telecom line, the wand may recognize both that line and the gas line you’re looking for,” Lumbers says. “That will result in bleeding off — you won’t isolate the line you’re trying to find.”
Incorrect frequency selection — starting on the high end, for example — is another common mistake. “If I can successfully locate that utility using a lower frequency, then I don’t have to change to a higher frequency that’s more likely to bleed off,” he says.
You can expect to spend anywhere from around $2,500 to $8,000 for a utility locating system, depending on features and accessories. To get a good return on investment, consider brands that offer features such as longer battery life, remote control operation for changing frequencies, and dual-output units that allow you to locate two lines simultaneously. All these features improve productivity and efficiency, Lumbers notes.
Given the complexity of the technology, are these locator systems difficult to operate? Not with proper training, he says. “It’s not difficult for me, and I’m not an engineer. If I can do it, anyone can.”
When utility workers use locators, they’re typically verifying the work already performed by contracted utility locating services. Isn’t that just wasteful duplication of services? Not really, explains Lumbers.
“Just because someone puts paint on or flags in the ground doesn’t mean they’re accurate,” he says, referring to the color-coded paint marks or flags used to mark utilities. (Red indicates electric power lines, green refers to sewer lines, yellow marks gas lines, blue indicates waterlines and orange points out communications lines.) “Plus, they have a margin of error that ranges from 18 to 24 inches on each side (of the markings or flags). Moreover, their markings don’t tell you the exact depth of the lines.
“One issue we have in the field is that contract locators get paid by the ticket,” he continues. “The more tickets they get done, the more they get paid, so it’s all about speed. So if I pull up on a job site, the first thing I want to do is verify the utility location and its depth.”
Then, it’s up to you to safely expose the utilities.
Continue reading for free